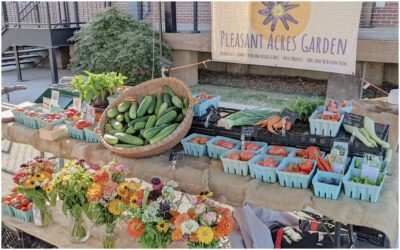
I love a fresh, home-grown salad. It’s healthier to eat home-grown organic foods and when you’ve put in the time to see the harvest to fruition, it just tastes better!
My area for gardening is limited, so in order to include all the herbs and vegetables we like, hubby and I built a garden table. It’s a great, inexpensive way to grow fresh, flavorful salad greens, herbs and shallow-growing fruits and vegetables. You may also enjoy using the table as a means of growing transplants from your garden. It’s easy to construct (basically a shallow wooden frame with a mesh bottom, and legs, or even one without legs and simply set on saw horses), but it also stands waist level so it eliminates bending and kneeling to weed and harvest.
This ingenious table was originally designed in 2006 by University of Maryland gardening expert Jon Traunfeld, who got the idea from a metal version he saw being used on an organic farm. The table takes up little space and it’s a great way to get into gardening at home (shorten the legs and overall size and the kids have a perfect table to grow their own veggies). The three-and-a-half inch depth is perfect for salad greens, and the special soil mixture (fifty percent soil-less mix and fifty percent high-quality compost) allows for quick growth. There are no weeds and since it sits high off the ground you’ll have fewer pest problems. Hoops for cloth covers can be added if the sun brings too much heat or when the weather turns much cooler.
Another great thing about the garden table is the portability. If you place your table on a level surface, you can incorporate rollers so the table is easier to move in and out of the sun, depending on the weather.
A variety of plants can be included in a garden table, whether from seeds or seedlings. Lettuce varieties are typically fast growing and yield the biggest crops (leaf, romaine, butterhead) as well as types of broccoli (arugula, broccoli rabe, kale, mustard, Asian greens). Chard, spinach, radishes, beet greens, basil, and other herbs will also grow well, but slower. Bush green beans also thrive. Increase the depth of your frame and you can include tomatoes, peppers, and cucumbers.
It costs around $35 in materials to build, and around $20 for seeds or seedlings and soil. The tables can also be purchased online and shipped ready to assemble from a variety of sources. I like to create things myself and with a little help from hubby, our table was built in a short amount of time. Following is a list of materials you’ll need to build your own garden table.
Materials
(for a 33” wide X 58” long table):
> (2) Untreated framing lumber 10-foot-long 2x4s
> (2) Untreated framing lumber 12-foot-long 2x4s
> 2 ½” galvanized deck screws
> 3/8″ staples
> 1 pound of 1″ roofing nails
> 3-by-5-foot roll of aluminum window screening
> 3-by-5-foot roll of ½” mesh hardware cloth
(galvanized wire mesh; comes in a roll)
> Handsaw
> Hammer
> Tape measure
> Square
> Tin snips
> Staple gun
> Drill
Section Measurements
Tip: I had the sections cut at the hardware store. It saved time
and I was confident they were measured correctly.
Cut (2) 58” sections from a 10’ 2 X 4 (long sides)
Cut (4) 30” sections from the other 10’ 2 X 4 (cross pieces)
Cut (4) 32.5” sections from a 12’ 2 X 4 (inside support legs)
Cut (4) 36” sections from the other 12’ 2 X 4 (outside legs)
Attach the long sides (58”) to the cross sections (30”) using the
2 ½” galvanized screws (2 screws per cross section). The two interior cross sections are attached 18 ¾” from each end of the long section (this creates three roughly equal sections).
NOTE YOU WILL NEED TWO PEOPLE FOR THIS STEP
Center the window screen on the outside bottom of the frame. Two people are needed in order to stretch the screen taut and adhere it with staples to the frame bottom and sides using a staple gun.
Center the hardware cloth over the window screen, pull it taut, and staple it to the frame bottom. Hammer in roofing nails around the frame for added support. Cut the hardware cloth diagonally at each corner with tin snips. Fold the cloth up and onto the sides of the frame, then staple and nail it in place.
Attach each 32 ½” leg to a 36” leg using the 2 ½” galvanized wood screws — this will create sturdy support for your table. The table frame will sit on the shorter section of each 2-piece leg. Attach each leg, 4″ in from the four corners, by placing three 2 ½” screws through the top of each leg and into the long side of the frame. Feel free to paint the exterior sections of your garden table with an exterior latex paint.
Handy Tips
• Drill pilot holes with a 1/8” drill bit before driving in the
galvanized screws.
• Use sandpaper to clean up rough edges.
• Cover the edge of the window screen and hardware cloth on all four sides of the frame using inexpensive molding.